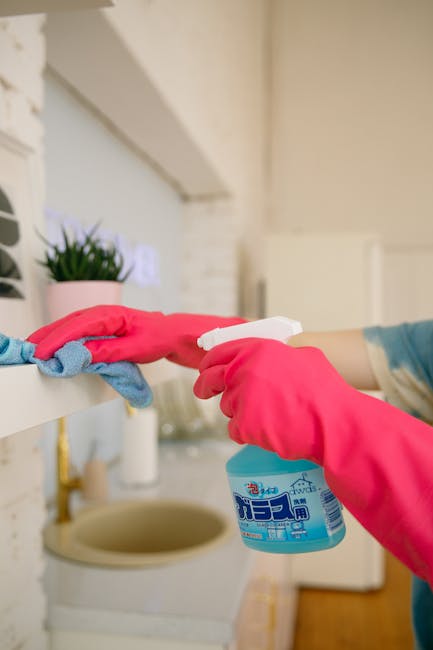
SW1 end of tenancy cleaning checklist for landlords in London
If you let property in SW1, you already know the drill: tenants move out, the keys come back, and suddenly every scuff mark, greasy oven tray, and dusty skirting board feels like it matters more than it did yesterday. A solid SW1 end of tenancy cleaning checklist for landlords in London helps you reset the property properly, protect its presentation, and reduce avoidable disputes at check-out. It is not just about making the flat look nice. It is about taking control of the move-out process in a busy London rental market where details are noticed, and sometimes argued about.
This guide walks through what to check, how to inspect it, what gets missed most often, and how to decide whether a landlord-led clean, a tenant clean, or a professional end of tenancy cleaning service makes the most sense. It is written for real-world SW1 landlords, including those dealing with period flats, compact studio lets, and properties that have seen one too many takeaway dinners.
Why SW1 end of tenancy cleaning checklist for landlords in London Matters
Let's face it, end of tenancy cleaning is one of those jobs that only feels simple until the property is empty. Then every dust patch shows up in daylight, every water mark seems louder, and even a tidy flat can look underwhelming if the little things have been missed. For landlords in SW1, that matters because presentation has a direct effect on re-letting speed, viewing impressions, and how smoothly the handover goes.
SW1 is a mixed pocket of central London with high expectations. Tenants often expect premium finish, and incoming occupants usually do too. A clean property is not just pleasant; it signals care. It can also make inventory reporting easier because you are starting from a clearer baseline. If a tenant has left the property reasonably well but the kitchen extractor, bathroom limescale, or carpet edges are neglected, the whole place feels unfinished. That is where a detailed checklist earns its keep.
There is another practical point. End of tenancy disputes often begin with vague language like "not cleaned properly" or "general mess left behind." A structured checklist gives you a firmer reference point. You can inspect room by room, note what is satisfactory, and separate wear-and-tear from genuine cleaning issues. That distinction is huge, and in a city like London, it can save time and a bit of emotional energy too.
Expert summary: The best landlord checklist is not the longest one. It is the one that is specific, repeatable, and matched to the property type. A small SW1 flat and a larger managed apartment block do not need identical cleaning priorities, but both need clear standards.
How SW1 end of tenancy cleaning checklist for landlords in London Works
The process works best when you treat it as three separate stages: pre-inspection, cleaning, and post-clean verification. That may sound obvious, but a lot of landlords skip straight to the middle and then wonder why something gets missed. A proper workflow keeps things calm and consistent.
First, inspect the property before anyone starts cleaning. Walk through each room and note what is dirty, damaged, or simply worn. Check against the original inventory if you have one. If you are using a professional cleaning company, this is the moment to flag extra attention areas like ovens, carpets, windows, or heavy grease build-up.
Second, clean in a logical order. Most professionals start high and work down: cobwebs, tops of cabinets, light fittings, then surfaces, then floors. That keeps dust from landing on already-clean areas. In a compact SW1 kitchen, for example, cleaning the cupboards before the splashback usually makes the job slower, not faster. A bit annoying, but true.
Third, verify the result. The final pass should be done in daylight where possible, or with strong natural light. Check behind doors, inside drawers, around taps, under appliances, and in awkward corners. These are the places that trip people up. The property might look fine from the doorway, yet still fail on a proper inspection.
If you want to outsource part or all of the work, a professional deep cleaning approach can be a sensible bridge between a basic tenant clean and a full move-out reset. It is especially useful where the property has been occupied for a long time or has a few stubborn problem areas.
Key Benefits and Practical Advantages
A landlord checklist is not glamorous. It is useful, which is better. Used properly, it can improve the whole turnover process in a few very practical ways.
- Faster re-letting: A properly cleaned property photographs better and feels ready sooner.
- Fewer disputes: A documented inspection makes it easier to separate cleaning problems from normal wear and tear.
- Better contractor instructions: Whether you use in-house cleaners or a specialist team, you can point them to exact priorities.
- More consistent standards: Useful if you manage more than one property, or if different tenants move in and out at different times of the year.
- Improved tenant experience: A clean handover feels more professional, which helps preserve goodwill even when the tenancy is ending.
There is also a quieter benefit: confidence. When you know the checklist is being followed, you are less likely to chase details later or second-guess what was checked. That peace of mind is worth something, especially when move-out days are already busy enough.
For landlords handling larger homes or furnished lets, it can also be sensible to pair a move-out clean with targeted services like carpet cleaning or window cleaning where the condition of those surfaces heavily affects first impressions. Not every property needs both, of course, but many do.
Who This Is For and When It Makes Sense
This checklist is for landlords who want a more controlled handover. That includes private landlords, portfolio landlords, agents managing SW1 stock, and even landlords who do a lot of the letting admin themselves. If you rent out a flat near Victoria, Pimlico, Westminster, or the surrounding central London area, you will know that turnover timing can be tight. A clean that starts late can quickly push back check-in, and nobody enjoys that conversation.
It also makes sense when:
- the tenancy has ended and you need a structured exit inspection;
- the property is furnished and has more surfaces to check;
- there are carpets, rugs, sofas, or upholstered items that need attention;
- the property has been let for a long period and needs a reset before marketing;
- you want to reduce back-and-forth with tenants over cleaning expectations.
One practical note: if you are managing multiple properties, it can be worth building a repeatable process rather than reinventing the wheel each time. The same rooms, the same order, the same checks. It sounds boring, and perhaps it is, but boring is efficient.
For furnished properties, you may also want to look at upholstery cleaning or sofa cleaning where fabric furniture has picked up smells, marks, or general dullness. That is especially relevant in smaller central London lets, where soft furnishings see a lot of daily use.
Step-by-Step Guidance
Here is a practical way to work through an SW1 end of tenancy clean without missing the annoying bits. You do not need to be theatrical about it. Just thorough.
- Start with the inventory and photos. Confirm what the property looked like at the start of the tenancy and note any exceptions agreed later on.
- Remove leftover items and waste. Check cupboards, under beds, utility spaces, balconies, and storage areas. If a tenant has left clutter behind, you may need a broader clearance approach before the clean. In some cases, house clearance support can help the job move faster.
- Open windows and air the property. It helps with odours and makes it easier to spot lingering issues, especially in kitchens and bathrooms.
- Clean room by room, top to bottom. Start with dusting, then wiping, then sanitising where appropriate, then floors last.
- Give special attention to kitchens and bathrooms. These rooms usually generate most complaints because they reveal grime quickly.
- Check appliances carefully. The oven, fridge, and extractor are the usual culprits. A neglected oven is one of those things nobody notices until they really, really do. If needed, arrange a dedicated oven cleaning service.
- Inspect floors, carpets, and edges. Move portable items where safe, check corners, and look for marks near entrances and traffic paths.
- Finish with glass and mirrors. Fingerprints and smears stand out more than people expect, especially on sunny afternoons.
- Do a final walkthrough with the checklist in hand. Compare room by room, then document anything that still needs attention.
In a typical SW1 flat, the bathroom mirror might look fine from one angle and patchy from another. The same goes for taps, splashbacks, and chrome fittings. A final scan from different angles catches a lot of these sneaky bits. You can almost hear the difference when surfaces are actually clean, if that makes sense.
Expert Tips for Better Results
In practice, the best results come from small habits done properly, not from heroic effort at the end. A few things we have seen make a real difference:
- Use daylight whenever possible. Artificial light can hide dust and streaks.
- Do the kitchen last if it is heavily used. Grease and crumbs have a way of resurfacing after you thought you were done.
- Pay attention to touch points. Handles, switches, banisters, and remotes collect grime more quickly than people realise.
- Check ventilation areas. Extractor fans, vents, and grilles are easy to ignore and very visible once spotted.
- Clean behind movable furniture. Even a light dust line can create the impression that the room was rushed.
- Ask for photos after the clean. Helpful if you are not on site and want evidence for your records.
If the property has hard flooring, grime often settles along the edges and under dining chairs. In that case, a specialist hard floor cleaning approach can be more effective than a quick mop. And for window-heavy flats, clean glass makes a surprisingly big difference to how bright the whole place feels. A little sunlight goes a long way, honestly.
Another small but useful habit: keep a "repeat offenders" note for each property. Maybe it is the oven seal in one flat, or the bathroom grout in another. Over time, that note saves you from rediscovering the same problem every tenancy.
Common Mistakes to Avoid
Most end of tenancy cleaning problems are not dramatic. They are just overlooked. Which is annoying, because they are also avoidable.
- Assuming "tidy" equals "clean." A property can look orderly and still fail on grease, dust, and limescale.
- Skipping hidden areas. Behind radiators, under sinks, and around appliance seals are frequent problem spots.
- Ignoring odours. A room may be spotless visually but still smell stale if upholstery, bins, or soft furnishings were not addressed.
- Leaving the oven until last. If it is stubborn, it may take longer than the whole bathroom.
- Not matching the cleaning standard to the inventory. Expectations should reflect what was originally provided.
- Forgetting windows and frames. Clean glass is good; dirty frames undermine it.
One of the most common landlord mistakes is trying to solve a move-out clean as if it were a regular domestic tidy-up. It usually isn't. If the property has been vacant for a while, or if builders have left residue behind after repairs, you may need something closer to one-off cleaning or even after builders cleaning support before the place is genuinely ready.
And yes, there is also the classic mistake of not allowing enough time. A rushed clean looks rushed. It just does. Better to build in an extra buffer than to be scrambling with a cloth and a half-charged vacuum five minutes before handover.
Tools, Resources and Recommendations
You do not need a warehouse of equipment, but the right tools make the job smoother and less frustrating.
| Area | Useful tools or materials | Why they help |
|---|---|---|
| Kitchen | Degreaser, non-scratch pads, microfiber cloths | Helps remove built-up grease without damaging surfaces |
| Bathroom | Limescale remover, toilet brush, grout brush | Targets taps, tiles, showers, and hard water marks |
| Living areas | Vacuum cleaner, dusters, glass spray | Handles dust, upholstery crumbs, and visible marks |
| Floors | Appropriate mop, floor-safe cleaner, edge tool | Protects flooring and improves finish along skirting lines |
| Soft furnishings | Fabric-safe upholstery treatment, spot cleaner | Useful for stains and general freshening up |
For carpeted lets, a proper carpet cleaning visit can make the property feel much newer, even when the carpet itself is not new at all. If you have rugs that hold onto dust or pet smells, rug cleaning is worth considering too. These are the kinds of details tenants notice immediately, even if they cannot quite explain why the room feels different.
If you are deciding between doing it yourself and hiring help, it is often useful to compare time, effort, and finish quality honestly. Landlords are rarely short on opinions, but time is a bit more limited.
Law, Compliance, Standards and Best Practice
There is no need to overcomplicate this part. End of tenancy cleaning is usually governed more by tenancy agreement terms, inventory evidence, and general expectations of fair handover than by a single dramatic rulebook. Still, landlords should be careful and consistent.
Best practice usually includes:
- using a clear inventory at the start and end of the tenancy;
- documenting the condition of rooms, fixtures, and furnishings;
- distinguishing between cleanliness issues and normal wear and tear;
- being reasonable about what is expected from tenants;
- keeping records if any deductions or disputes may follow.
If you use professional cleaners, it also makes sense to check practical matters such as insurance, health and safety processes, and service terms. That is not box-ticking; it is sensible risk management. A trustworthy provider should be able to explain how they work. For extra reassurance, some landlords like to review a company's insurance and safety information and its published health and safety policy before booking.
It is also wise to keep the process fair and transparent if anything goes wrong. If you ever need to raise an issue, having a clear record of the service and what was agreed makes the discussion much easier. That is true for everyone, not just landlords.
Options, Methods, or Comparison Table
There is more than one way to handle an SW1 end of tenancy clean. The right choice depends on the property, your time, and how exacting the handover needs to be.
| Option | Best for | Pros | Trade-offs |
|---|---|---|---|
| Landlord-led clean | Small, well-kept properties | Full control, lower direct cost, easy to schedule | Time-consuming and easy to miss detail |
| Tenant-led clean | When the tenancy agreement clearly sets expectations | No landlord labour, simple if tenants are cooperative | Quality can vary, and standards may not be met |
| Professional end of tenancy cleaning | Busy landlords, furnished lets, larger properties | More consistent finish, less stress, better coverage | Requires booking, and quality depends on the provider |
| Targeted specialist add-ons | Problem areas like ovens, carpets, upholstery, windows | Efficient for stubborn or visible issues | Not always enough on its own for a full handover clean |
For many SW1 landlords, the best answer is a mix: a broad clean, plus a few targeted specialist tasks. That way, you are not paying for unnecessary extras, but you are also not underestimating the obvious trouble spots. A room can be 90 percent done and still look tired because of one oven door or one streaky window. Funny how that works.
Case Study or Real-World Example
Picture a furnished one-bedroom flat near Pimlico that has been let for just under two years. The tenant leaves the place in decent shape: no major damage, no rubbish piles, and the floors are swept. On paper, not bad. But on inspection, the kitchen extractor has a film of grease, the oven has baked-on residue, the sofa has drink marks on one arm, and the bathroom glass has limescale around the shower screen.
Individually, these are not disasters. Together, they change the feel of the property. It goes from "nearly ready" to "needs work." The landlord has two sensible choices. One is to manage the clean in-house with a solid checklist and several separate tasks. The other is to book a more complete service and add focused treatments for the worst areas.
In that kind of situation, a professional team can handle the general reset while also covering difficult items like oven cleaner support and carpets cleaning if the flooring is heavily used. The end result is usually calmer, faster, and cleaner than trying to piece it together at the last minute.
The real lesson? Even a property that looks "fine" can still benefit from a structured check. Especially in SW1, where the finish tends to be judged quickly and quite visually.
Practical Checklist
Use this section as a working landlord checklist before final sign-off. It is simple on purpose.
- Entrance and hallway
- Dust skirting boards, door frames, and light switches
- Check floors for scuffs, grit, and mat residue
- Inspect mirrors, glass panels, and internal doors
- Living room and bedrooms
- Dust shelves, ledges, and furniture tops
- Vacuum carpets and check edges and corners
- Wipe wardrobes, drawers, and handles
- Inspect curtains, sofas, and fabric surfaces for marks
- Kitchen
- Clean oven, hob, extractor, and appliance fronts
- Wipe cupboard fronts, handles, and worktops
- Remove grease from splashback and tile grout
- Check inside fridge, freezer, and under sink
- Empty bins and deodorise the area if needed
- Bathroom
- Remove limescale from taps, shower, and screen
- Clean toilet, basin, and surrounding tiles
- Check mirrors, grout, extractor fan, and seals
- Wipe inside cabinets and behind taps
- Floors and finishes
- Vacuum or mop all floors appropriately
- Check for stains, scratches, and residue
- Clean windows, sills, and frames
- Review everything in natural light before sign-off
Quick landlord rule of thumb: if a spot would be obvious to you during a viewing, it will probably be obvious to the next tenant too.
Conclusion
A good SW1 end of tenancy cleaning checklist for landlords in London is not about being fussy for the sake of it. It is about handing over a property with clarity, confidence, and a standard that matches the market you are operating in. In central London, those details matter. A polished kitchen, fresh carpets, clean windows, and a proper final walkthrough can turn a stressful move-out into a straightforward one.
If you keep the process structured, document what you see, and use professional help where it genuinely adds value, you will save time and reduce arguments. Simple as that, really. Not always easy, but simple.
Get a free quote today and see how much you can save.
And if you are refining your wider landlord maintenance process, it may also be worth exploring domestic cleaning for regular upkeep between tenancies or house cleaning support for fuller property resets. A well-kept property tends to stay easier to let. That part never really gets old.
Frequently Asked Questions
What should be included in an end of tenancy cleaning checklist for landlords?
A strong checklist should cover every room, with extra focus on kitchens, bathrooms, floors, windows, fixtures, appliances, and soft furnishings. It should also include hidden areas such as behind appliances, inside cupboards, and along skirting boards.
How detailed does the cleaning need to be for a landlord handover in SW1?
Detailed enough that the property looks ready for immediate occupation. In SW1, where presentation matters, that usually means more than a quick tidy. Marks, odours, grease, and dust in obvious places should all be addressed.
Is professional end of tenancy cleaning worth it for landlords?
Often yes, especially for furnished properties, busy turnaround schedules, or homes with stubborn dirt in ovens, carpets, or bathrooms. Professional cleaning can reduce stress and give you a more consistent finish.
Do landlords need to clean the property themselves before re-letting it?
Not necessarily. Many landlords arrange a professional clean or ask their managing agent to coordinate it. What matters is that the property meets the standard you expect for the next tenancy.
Which rooms cause the most problems at check-out?
Kitchens and bathrooms cause the most issues, followed by carpets and soft furnishings. These areas show grease, limescale, and wear very quickly, so they deserve the most attention.
What is the biggest mistake landlords make with end of tenancy cleaning?
Assuming the property is fine because it looks tidy from the doorway. The missed details are usually in the edges, under appliances, on glass, and inside storage areas.
Should I clean carpets separately from the rest of the property?
Usually, yes, if the carpets are visibly dirty or heavily trafficked. Carpet-specific cleaning can make a major difference to the final impression, especially in central London lets.
How can landlords avoid disputes over cleaning deductions?
Use a clear inventory, take dated photos, keep records of what was agreed, and make sure your standards are reasonable and consistent. Clear evidence is often more helpful than long arguments.
Are ovens and upholstery usually included in standard cleaning?
They may be included in a broad clean, but heavily soiled ovens, sofas, and upholstered furniture often need dedicated treatment. It is worth checking exactly what is covered before booking.
When should I book end of tenancy cleaning for a SW1 property?
Ideally after the tenants have fully moved out and before the final inspection or new tenant check-in. That gives you space to spot issues and avoid rushing the last stage.
What if the property has been empty for a while?
A vacant property often needs a deeper reset because dust settles, smells linger, and little marks become more noticeable. In that case, a deep clean or one-off clean is often more suitable than a light refresh.
Can landlords combine end of tenancy cleaning with other services?
Yes, and that is often the sensible approach. Carpet cleaning, oven cleaning, window cleaning, and upholstery cleaning can all be added where needed for a more complete result.